
JavaScript unit testing can be difficult to get started with. There are many ways to write JavaScript and numerous tools to help you do it. This post is going to focus on how to test front-end JavaScript code with Jest that is using Webpack as a module bundler. While the back-end technology should not make a difference, I will be using .NET Core to spin up a small sample app.
Before we get started make sure you have the .NET Core SDK and Node.js installed. If you do not you can download them by using the below links.
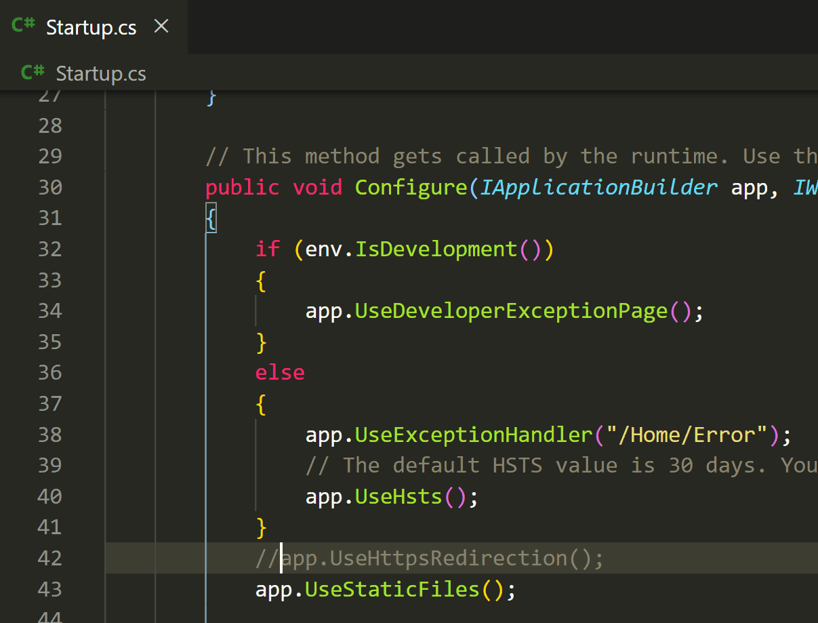
To begin, create a new directory somewhere called jest-testing. Open your favorite cli, navigate to that directory, and run the command dotnet new mvc. Open the folder jest-testing in whatever editor you prefer (I’m using VS Code) and open the file in the root of the project called Startup.cs. In the Configuremethod, comment out the line that says app.UseHttpsRedirection.
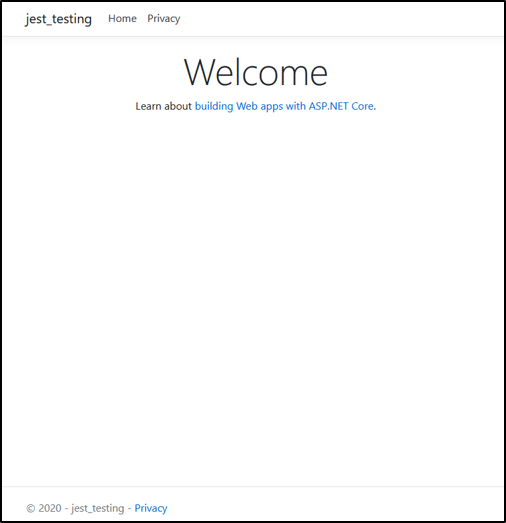
This will prevent us from having to add security exceptions in our browser to run the project. We now should be able to run the command dotnet run in our cli, open a web browser to http://localhost:5000 (or whatever URL is displayed in the cli), and see a functioning app.
Now to add some tests, but before we can do that, we need some code to write tests for. Create a file called todos.js with the following code and put it in the wwwroot/js/ folder.
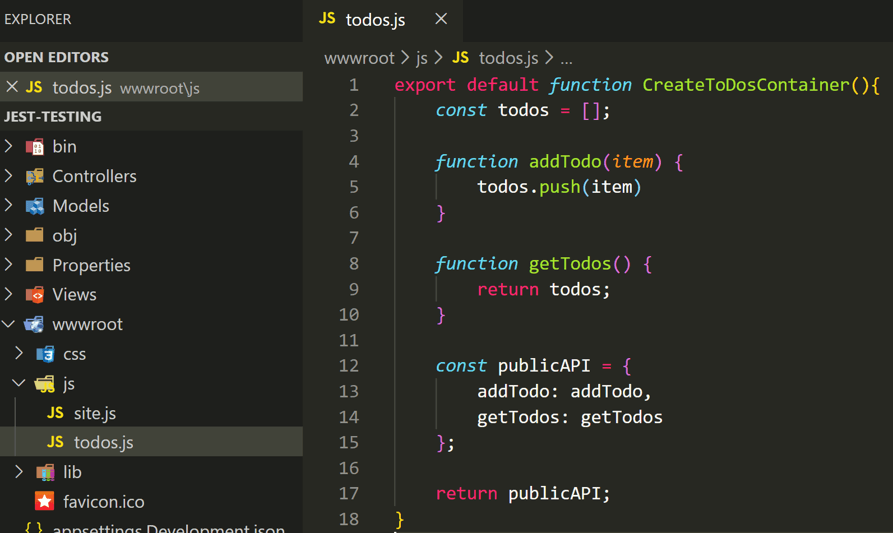
The CreateTodosContainer function follows the module pattern by encapsulating an inner todos list and exposing two public functions that operate on that list. Any calling code can use CreateTodosContainer by first importing it and then calling it to get a new todos container object.
To use our new CreateTodosContainer function, open the file wwwroot/js/site.js and replace its contents with the below code. Site.js is included in .NET Core’s layout file which means it will run on every page load.
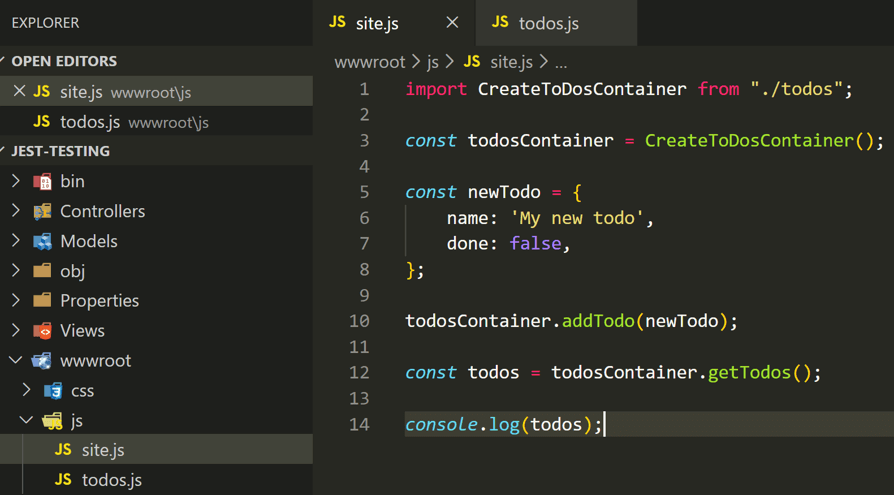
The above code first imports our CreateTodosContainer function from todos.js. It then creates a new todosContainer object by calling CreateTodosContainer. Next, a new todo is created and added to the list of todos. Finally, the list of todos is retrieved and logged to the console.
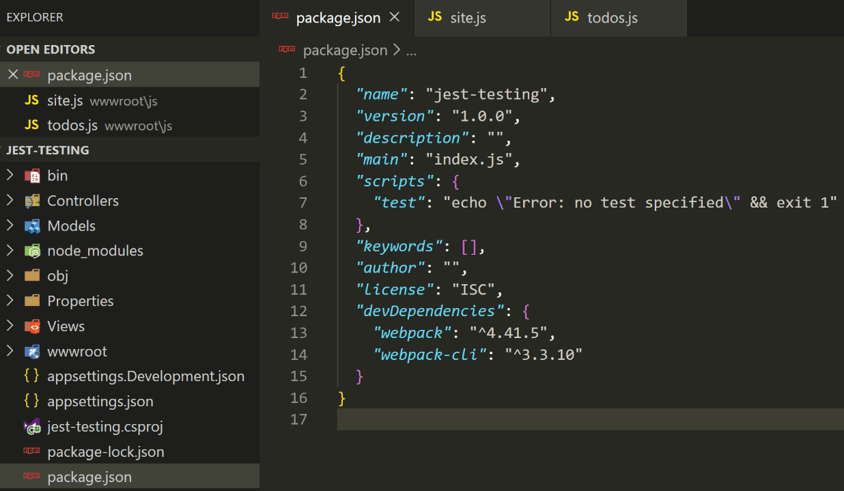
We now have some front-end code, but it will not run as-is. The browser cannot natively process import/export statements. This is where webpack comes in to play. In the root of the project, run the command npm init -y. This will setup npm and create a package.json file to manage our front-end dependencies. Next, run the command npm install -D webpack webpack-cli. This will install webpack and add it as a development dependency. Afterwards, our package.json file should look like this:
With webpack installed we can create a config file to setup webpack and tell it to process our JS files. Create a file called webpack.config.js and add the below code.
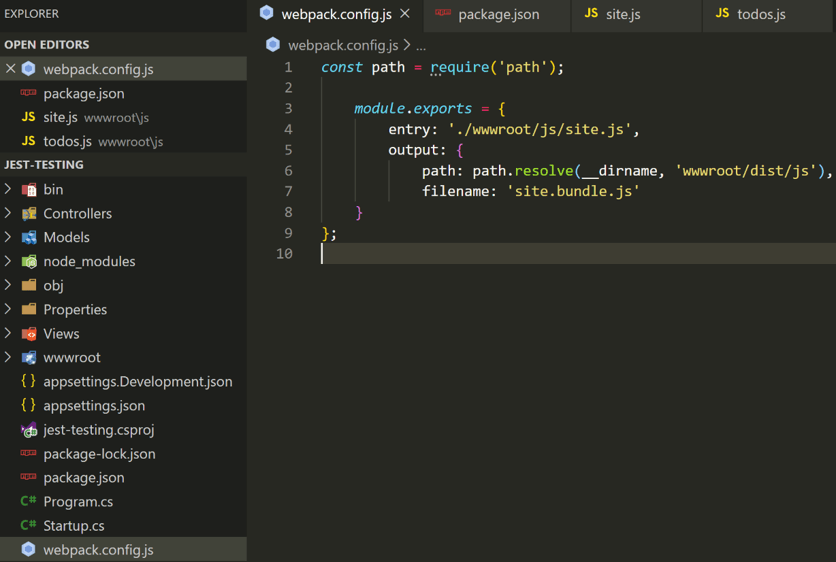
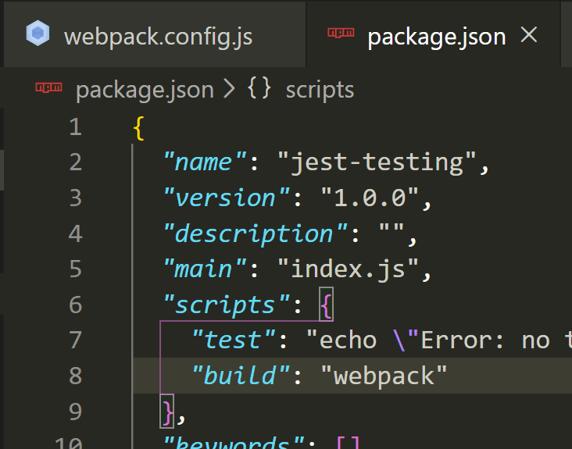
This configuration will tell webpack to process site.js and when it is done bundle up the results into a file called site.bundle.js and put it in the wwwroot/dist/js directory. There’s one last thing to do. In package.json, add a script to run webpack.
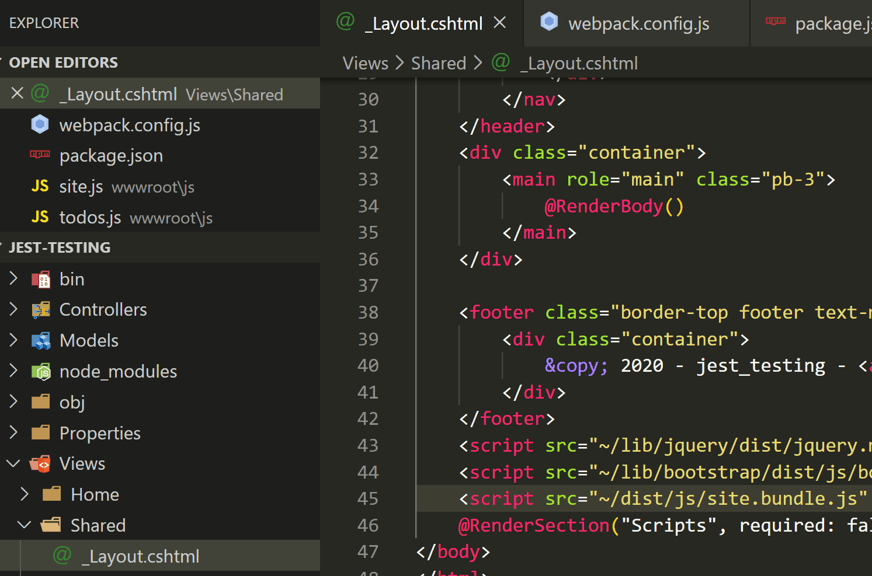
In your cli, run the command npm run build. This will create site.bundle.js. Then, open _Layout.cshtml and change the script tag to reference the new bundled file.
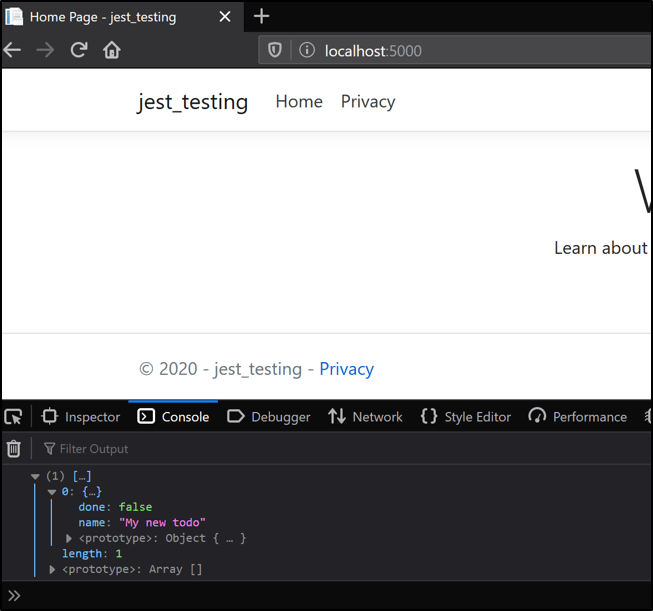
Run the project, open a browser, open the developer tools, and you should see the following logged to the console.
Finally, we have some front-end code that is ready to test, but before we can start testing we need our testing tool. To install jest in the project run the command npm install -D jest. Next, create a file called todos.test.js with the following code:
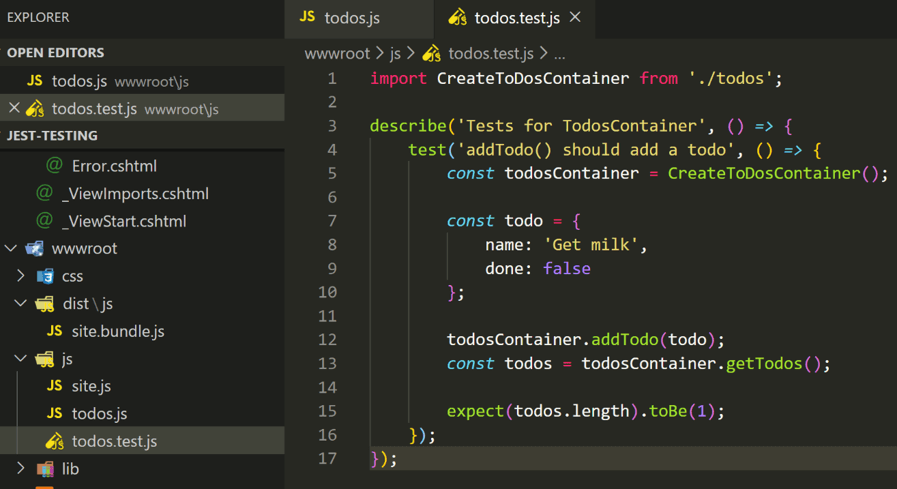
This test file imports our CreateToDosContainer from todos.js and then uses it inside the test. The describe is a container for tests and can contain multiple test functions. Each test function tests a single unit of functionality. In our scenario, the test function is creating a todosContainer, adding a todo, and then expecting the length of the todos list to be 1, since we added one todo.
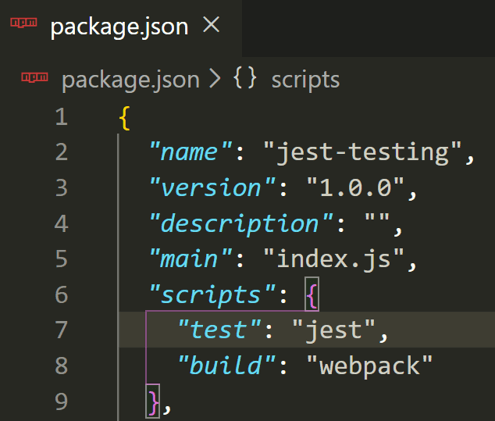
To run our newly created test, open package.json and modify the existing test script to use jest.
Then, run the command npm run test in your cli. Unfortunately, you will get the following error:
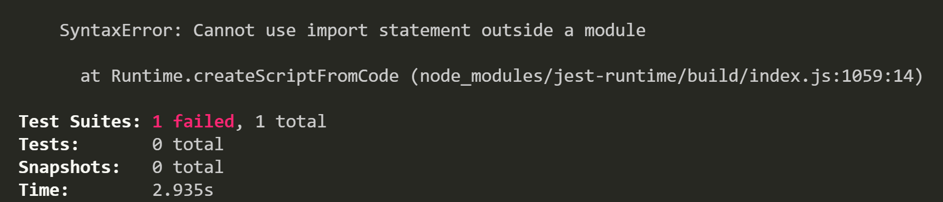
By default, jest cannot process import/export statements since it uses the Node.js runtime. Node.js uses require statements (CommonJS modules) instead of import statements (ES6 modules). Fortunately for us, there is a simple fix. We can use Babel to transpile the statements for Jest and allow it to work with import/export statements.
Install the necessary Babel packages with npm install -D @babel/core @babel/preset-env babel-jest. Then, create a babel.config.js with the following code.
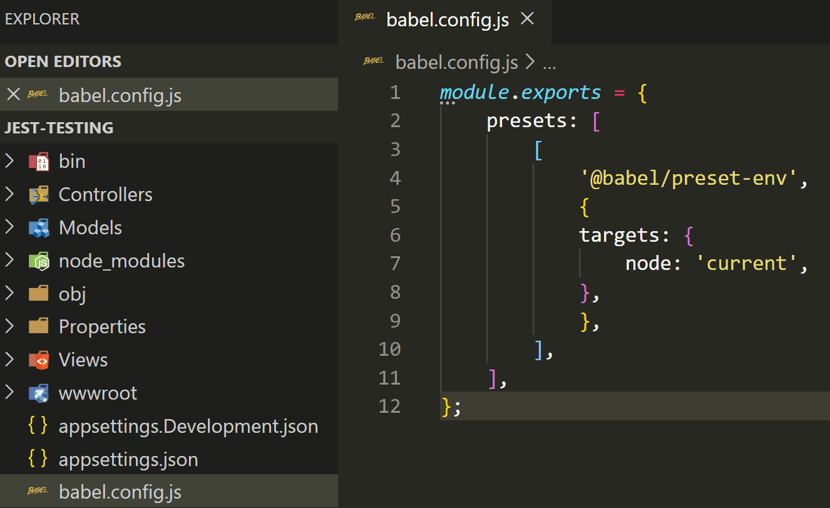
The combination of the babel-jest package and the Babel config will tell Jest to run all test files it finds through Babel first. Babel will then transpile the test code into a format that Jest can handle. If we run the test now (npm run test) it should work.
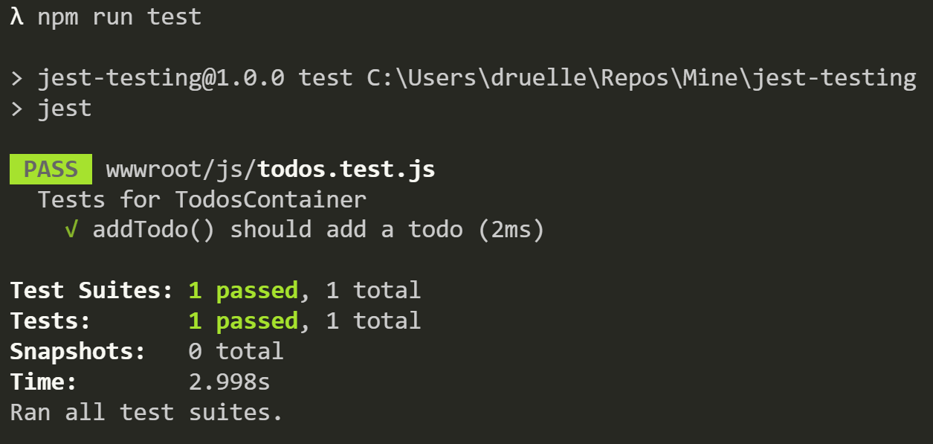
And we have a passing test!
From here on you should be able to add more front-end code to meet the needs of your application and write tests for all of it using Jest. With a full test suite, you can be confident that your code is performing as intended and will be protected from unexpected changes. Best of luck and happy testing!


